Here i'm going to describe how to install and configure WSO2 EMM server step by step.
What is WSO2 EMM Server?
https://docs.wso2.com/display/EMM201/About+WSO2+EMM
Architecture.

Installing on Windows
Follow the instructions below to download the binary distribution of WSO2 EMM:
The binary distribution contains the binary files for both MS Windows and Linux-based operating systems, compressed into a single ZIP file. This distribution is recommended for many users.
- In your web browser, go to http://wso2.com/products/enterprise-mobility-manager/
- Click the Download button in the upper right-hand corner of the page to download the latest version. To download an older version, click the Previous Releases link and then select the version that you want.
- Enter the required details in the form, and click Download.
System requirements
Memory
|
|
Disk
|
|
Device OS prerequisites
Platform
|
Supported Versions
|
|---|---|
| iOS | Version 7.0 - 9.0 |
| Android |
Version 4.1.x - 5.1
|
| Windows | Version 8.1 |
Follow the instructions below to install EMM on Windows.
Installing the required applications
- Be sure your system meets the prerequisites . Java Development Kit (JDK) is essential to run the product.
- Be sure that the
PATHenvironment variable is set to "C:\Windows\System32", because thefindstrwindows exe is stored in this path.
Installing EMM
- If you have not done so already, download the latest version of the product as described in downloading the product.
- Extract the archive file to a dedicated directory for the product, which will hereafter be referred to as
<PRODUCT_HOME>.
Setting JAVA_HOME
You must set your
JAVA_HOME environment variable to point to the directory where the Java Development Kit (JDK) is installed on the computer. Typically, the JDK is installed in the C:\Program Files\Java\ directory, such as C:\Program Files\Java\jdk1.8.0_101 . If you have multiple versions installed, choose the latest one, which you can find by sorting by date.
Follow the sections below to run a WSO2 product as a Linux service:
- Prerequisites
- Setting up CARBON_HOME
- Running the product as a Linux service
Prerequisites
Install JDK 1.6.24 or later or 1.7.* and set up the
JAVA_HOME environment variable. Setting up CARBON_HOME
Extract the WSO2 product to a preferred directory in your machine and set the environment variable
CARBON_HOME to the extracted directory location.Running the product as a Linux service
- To run the product as a service, create a startup script and add it to the boot sequence. The basic structure of the startup script has three parts (i.e., start, stop and restart) as follows:
 Given below is a sample startup script.
<PRODUCT_HOME>can vary depending on the WSO2 product's directory. In the above script, the server is started as a user by the name user1 rather than the root user. For example,
su -c "${startcmd}" user1 - Add the script to
/etc/init.d/directory.
If you want to keep the scripts in a location other than/etc/init.d/folder, you can add a symbolic link to the script in/etc/init.d/and keep the actual script in a separate location. Say your script name is prodserver and it is in/opt/WSO2/folder, then the commands for adding a link to/etc/init.d/is as follows:- Make executable:
sudo chmod a+x /opt/WSO2/prodserver - Add a link to
/etc/init.d/:sudo ln -snf /opt/WSO2/prodserver /etc/init.d/prodserver
- Install the startup script to respective runlevels using the command
update-rc.d. For example, give the following command for the sample script shown in step1:
Thedefaultsoption in the above command makes the service to start in runlevels 2,3,4 and 5 and to stop in runlevels 0,1 and 6.A runlevel is a mode of operation in Linux (or any Unix-style operating system). There are several runlevels in a Linux server and each of these runlevels is represented by a single digit integer. Each runlevel designates a different system configuration and allows access to a different combination of processes. - You can now start, stop and restart the server using
service <service name>{start|stop|restart}command. You will be prompted for the password of the user (or root) who was used to start the service.
Server Configurations
General server configurations
Follow the instructions below to configure general server configurations:
- Configure the monitoring frequency by configuring the
MonitorFrequencyparameter in thecdm-config.xmlfile, which is in the<EMM_HOME>/repository/confdirectory. Specify this value in milliseconds. The EMM server uses this parameter to determine how often the devices enrolled with EMM need to be monitored. By default, this value has been configured to 60000ms (1min).Example:
- Configure the following fields that are under the
<APIKeyValidator>tag in the<EMM_HOME>/repository/conf/api-manager.xmlfile.
This step is only applicable in the production environment. - Configure the
<serverURL>field by replacing${carbon.local.ip}with the hostname or public IP of the production environment.


- Configure the
<RevokeAPIURL>field by replacing${carbon.local.ip}with the hostname or public IP of the production environment.

- Enable HTTPS communication.
- This step is only required for the production environment. Once enabled, the HTTP requests will be redirected to use HTTPS automatically.
- You will need to setup the BKS file in the android agent once HTTPS is enabled.
- To enable HTTPS redirection for a specific web application, uncomment the following code in the respective web application's
web.xml.
Example: Enable HTTPS redirection for the mdm-android-agent web app by navigating to the<EMM_HOME>/repository/deployment/server/webapps/mdm-android-agent/WEB-INF/web.xmlfile.

- To enable HTTPS redirection for the entire servlet container, configure the
web.xml file, which is in the<EMM_HOME>/repository/conf/tomcatfolder, by including the following:

WSO2 EMM email configurations
Configure the email settings to send out registration confirmation emails to new users and invite existing users to register their device with WSO2 EMM.
In EMM, user registration confirmation emails are disabled by default, and the admin needs to provide the required configuration details to enable it.
- Create an email account to send out emails to users that register with EMM (e.g., no-reply@foo.com).
If you are using a Google mail account, you need to note that Google has restricted third party apps or less secure apps from sending emails. Therefore, you need to configure your account to enable this setting as WSO2 EMM acts as a third party application when sending emails to confirm user registrations or inviting existing users to register devices with WSO2 EMM. - Open the
<EMM_HOME>/repository/conf/axis2/axis2.xmlfile, uncomment themailtotransportSender section, and configure the EMM email account.
Formail.smtp.from,mail.smtp.user, andmail.smtp.password, use the email address, username, and password (respectively) from the mail account you set up.

- Configure the email sender thread pool.
Navigate to theemail-sender-config.xmlfile, which is in the<EMM_HOME>/repository/conf/etcdirectory, and configure the following fields under<EmailSenderConfig>.MinThreads: Defines the minimum number of threads that needs to be available in the underlying thread pool when the email sender functionality is initialized.MaxThreads: Defines the maximum number of threads that should serve email sending at any given time.KeepAliveDuration: Defines the duration a connection should be kept alive. If the thread pool has initialized more connections than what was defined inMinThreads, and they have been idle for more than theKeepAliveDuration, those idle connections will be terminatedThreadQueueCapacity: Defines the maximum concurrent email sending tasks that can be queued up.

- Customize the email templates that are in the
<EMM_HOME>/repository/resources/email-templatesdirectory.
The email templating functionality of WSO2 EMM is implemented on top of Apache Velocity, which is a free and open-source template engine.- Open the email template that you wish to edit based on the requirement, such as the
user-invitation.vm oruser-registration.vm file. - Edit the
<Subject>and<Body>to suite your requirement. - Restart WSO2 EMM.
If you need to accessHTTPorHTTPSbase URLs of the server within your custom template configs, use the$base-url-httpand$base-url-httpsvariables, respectively. - Open the email template that you wish to edit based on the requirement, such as the
WSO2 EMM Jaggery apps configurations to enroll and manage devices
In WSO2 EMM, only Android and iOS platforms use the agent to enroll devices with the EMM. The Windows platform uses the native workplace application to enroll devices with WSO2 EMM. Therefore, the following configurations steps are required only if you are registering or enrolling Android or iOS devices.
Follow the steps given below:
- Open the
config.jsonfile that is in the<EMM_HOME>/repository/deployment/server/jaggeryapps/emm-web-agent/configdirectory. - Configure the
hostattribute that is undergeneralConfigby providing the entire server address.
You are required to configure this file as it is used to handle device enrollments.
- To download the EMM Android agent in a testing environment configure the host attribute using an HTTP URL, because the Android browser does not trust hosts with self-signed certificates.
- To download the EMM Android agent in a production environment configure the host attribute using an HTTPS URL as the production server has a Certificate Authority (CA) installed with a valid SSL certificate.

- Open the
config.jsonfile that is in the<EMM_HOME>/repository/deployment/server/jaggeryapps/emm/configdirectory. - Configure the
hostattribute that is undergeneralConfigby providing the entire server address.
You are required to configure this file as it is used to manage the devices.
In a clustered environment, configure the host attribute by providing the entire server address (by changing only the protocol to HTTPS and the port to the HTTPS port) that was given for the host attribute in the emm-web-agent'sconfig.jsonfile. This is required because the EMM configurations refer to the emm-web-agent app as it is used to handle device enrollments.

WSO2 App Manager configurations to manage applications in WSO2 EMM
Follow the steps given below to configure WSO2 App Manager for the EMM:
- Open the
carbon.xmlfile that is in the<EMM_HOME>/repository/conf directory. - Uncomment the
HostNameattribute and provide the server IP.
Default:An example after the configuration:

- Uncomment the
MgtHostNameattribute and provide the server IP.
Default:An example after the configuration:
- Comment the uncommented ServerURL and uncomment the ServerURL attribute that was commented by default.
Configure the uncommented ServerURL as follows:- Provide
localhostas the value for{carbon.local.ip}. - Provide the
httpsport as the value for{carbon.management.port}.
By default, the port is 9443. - Remove
${carbon.context}.
By default:An example after the configuration: - Provide

- Restart the WSO2 EMM server.
- Login to the WSO2 App Manager publisher to publish application or WSO2 App Manager store to install apps on mobile devices.
- Access the WSO2 App Manager publisher:
- http://localhost:9763/publisher
- https://localhost:9443/publisher
- Access WSO2 App Manager store
- http://localhost:9763/store/
- https://localhost:9443/store
- Access the WSO2 App Manager publisher:
SSO configurations
Follow the steps given below to configure single sign-on (SSO) for EMM:
- Enable SSO in the following configuration files, under the
ssoConfigurationsection: config.jsonfile, which is in the<EMM_HOME>/repository/deployment/server/jaggeryapps/emm/configdirectory.store.jsonfile, which is in the<EMM_HOME>/repository/deployment/server/jaggeryapps/store/configdirectory.publisher.jsonfile, which is in the<EMM_HOME>/repository/deployment/server/jaggeryapps/publisher/configdirectory.


- Configure the Identity Provider (IdP) in the following configuration files, under the
ssoConfigurationsection:
For example, you can use the following steps to configure WSO2 Identity Server (IS) as an Identity Provider (IdP).config.jsonfile, which is in the<EMM_HOME>/repository/deployment/server/jaggeryapps/emm/configdirectory.store.jsonfile, which is in the<EMM_HOME>/repository/deployment/server/jaggeryapps/store/configdirectory.publisher.jsonfile, which is in the<EMM_HOME>/repository/deployment/server/jaggeryapps/publisher/configdirectory.


By default, an Identity Provider (IdP) has been bundled with the EMM binary pack. If you wish to use this default IdP in EMM, modify thehost/ipto the Server IP. If you wish to use your own IdP, modify thehost/ipto your own IdP's host in the following files: - Update the SSO related IDP configurations in the
sso-idp-config.xmlfile, which is in the<EMM_HOME>/repository/conf/identitydirectory, by updating all the entries that statelocalhostto your IDP's IP address or domain.


- If you are running WSO2 EMM on a cluster setup or a virtual machine, you must configure the following fields under
<SSOConfiguration>in theapp-manager.xmlfile that is in the<EMM_HOME>/repository/confdirectory.IdentityProviderUrlproviderURL
- By default,
<EMM_HOST>islocalhost.However, if you are using a public IP, the respective IP address or domain needs to be specified. - By default,
<EMM_HTTPS_PORT>has been set to 9443. However, if the port offset has been incremented byn, the default port value needs to be incremented byn.

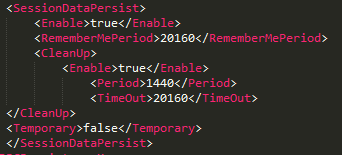
- Enable authentication session persistence by uncommenting the following configuration in the
<EMM_HOME>/repository/conf/identity/identity.xmlfile, under theServerandJDBCPersistenceManagerelements.
Starting the server
When starting WSO2 EMM, it is mandatory to have an active internet connection; otherwise, the devices will not be able to connect to EMM.
Follow the instructions below to start your WSO2 product based on the Operating System you use:
On Windows/Linux/Mac OS
To start the server, you run
<EMM_HOME>/bin/wso2server.bat (on Windows) or <EMM_HOME>/bin/wso2server.sh (on Linux/Mac OS) from the command prompt as described below. Alternatively, you can install and run the server as a Windows or Linux service (see the related topics section at the end of this page).- Open a command prompt by following the instructions below:
- On Windows: Click Start -> Run, type
cmdat the prompt, and then press Enter. - On Linux/Mac OS: Establish an SSH connection to the server, log on to the text Linux console, or open a terminal window.
- Navigate to the
<EMM_HOME>/bin/directory using the Command Prompt. - Execute one of the following commands:
- To start the server in a typical environment:
- On Windows:
wso2server.bat --run - On Linux/Mac OS:
sh wso2server.sh
- On Windows:
- To start the server in the background mode of Linux:
sh wso2server.sh start
To stop the server running in this mode, you will enter:sh wso2server.sh stop - To provide access to the production environment without allowing any user group (including admin) to log into the Management Console:
- On Windows:
wso2server.bat --run -DworkerNode - On Linux/Mac OS:
sh wso2server.sh -DworkerNode
- On Windows:
- To check for additional options you can use with the startup commands, type
-helpafter the command, such as:sh wso2server.sh -help(see the related topics section at the end of this page). - The operation log appears in the command window. When the product server has successfully started, the log displays the message "WSO2 Carbon started in 'n' seconds".
Accessing the EMM Console
Once the server has started, you can access the EMM Consoles. You can also use the EMM Console on this computer or from any other computer connected to the Internet or LAN.
When these pages appear, the web browser will typically display an "insecure connection" message, which requires your confirmation before you can continue.
The EMM consoles are based on the HTTPS protocol, which is a combination of HTTP and SSL protocols. This protocol is generally used to encrypt the traffic from the client to server for security reasons. The certificate it works with is used for encryption only, and does not prove the server identity, so when you try to access these consoles, a warning of untrusted connection is usually displayed. To continue working with this certificate, some steps should be taken to "accept" the certificate before access to the site is permitted. If you are using the Mozilla Firefox browser, this usually occurs only on the first access to the server, after which the certificate is stored in the browser database and marked as trusted. However, with other browsers, the insecure connection warning might be displayed every time you access the server.
This scenario is suitable for testing purposes, or for running the program on the company's internal networks. If you want to make these consoles available to external users, your organization should obtain a certificate signed by a well-known certificate authority, which verifies that the server actually has the name it is accessed by and that this server belongs to the given organization.
Signing into the EMM
- Start the server and access the EMM Console.
https://<EMM_HOST>:<EMM_PORT>/emm
- Enter the username. The super tenant administrator has to use
adminas his/her username. While, the end-user has to use the username that was mentioned in the registration invitation email. - Enter the password. The super tenant administrator has to use
adminas the password. While, the end-user has to use the default password that was mentioned in the registration invitation email. - Click LOG IN. The respective EMM Console will change, based on the permissions assigned to the user.
Example: The EMM console for an administrator.

Signing out of the EMM
Click the user icon, and click LOG OUT.
Example:

Stopping the server
To stop the server, press Ctrl+C in the command window.